How to Create a CategoryEasyFastSimple.

To Start
How to Create a Category
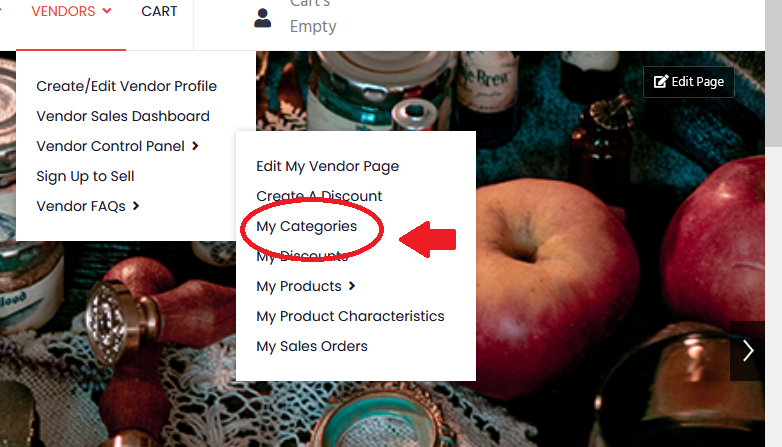
- Hovering above the vendor -> vendor control panel button, a short menu should cascade down.
- Select “My Categories” from the options available.
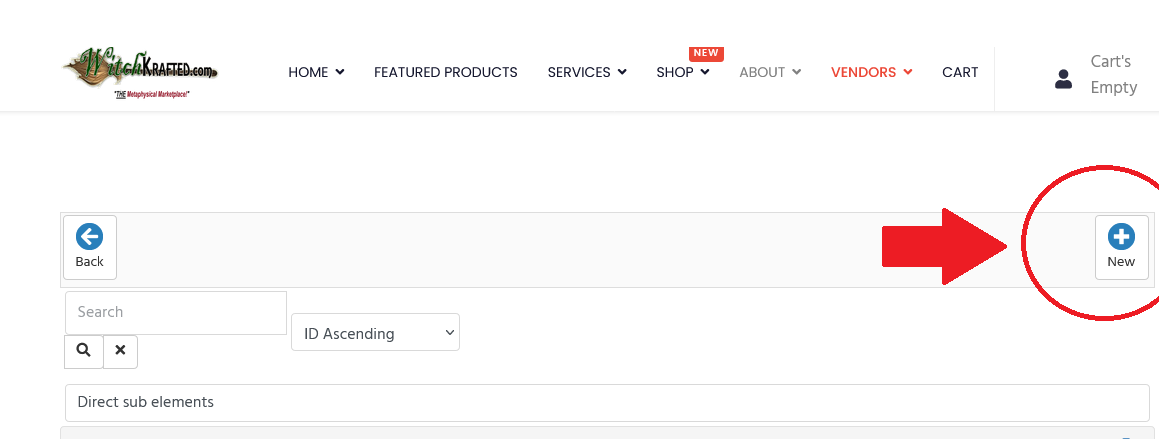
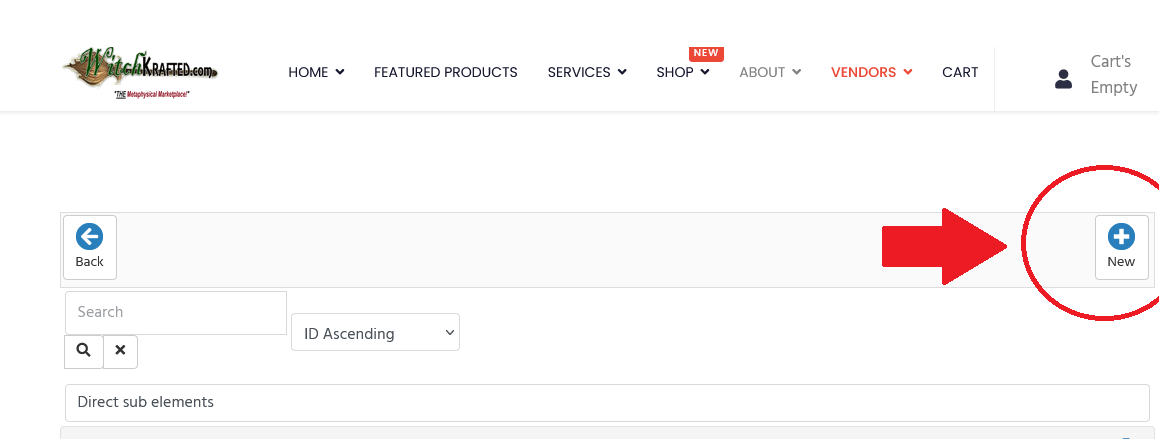
- At the category page,click "New+” enter your information, complete the CAPTCHA, and select the “Shopper” level subscription.
Inputting Basic Information
Category Info
Basic information
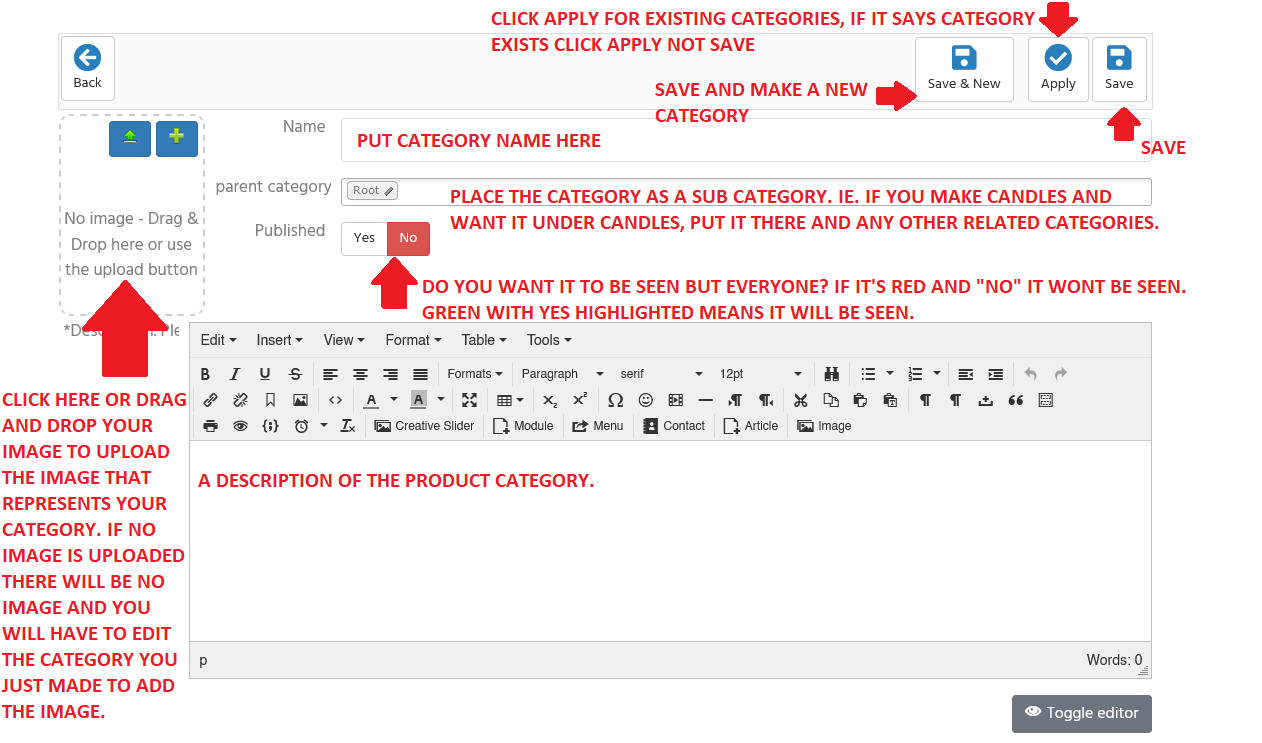
Start with Basic Information for the Category. Remember all these items and have them prepared.- Category Name: *If you get an error that the Category Name already exists use your vendor name before the category. IE. Instead of Bracelets, use Myah's Bracelets. It not only helps you identify but helps for Google searchs to find your specific products and categories.
- Root Category: If you want this to appear in more than just the main category "product category, like Bracelets, select the Bracelets Category, also select any other categories like Opal Jewelry and etc.
- Published: This determines if the category is published and viewable by people. If you see "No" with red highlighted it will not be viewable, if it is "Yes" Highlighted in Green it is viewable.
- Category Image: As you see "No Image" on the left, if you want to add a category image even your logo click on the plus to have a popup windows help you navigate to the image, or drag and drop the file the the outlined area. If no images is used Witchkrafted's logo will be used.
- Description: Provided the Description that will be seen by visitors of the site when they view this the category you are creating.
Step 2
Input SEO Information
Final Step Click Save
Clicking Save, Apply or Save & New?
What do I do?
After inputting all theinformation nessacary for the item you can click Apply, Save or Save & New. If you are making new item, click Save! IF you are EDITING an item CLICK APPLY. If you are making a bunch of new items, click Save and New to continue making a new item without having to go back to the initial screen.
Final Step Click Save
Lets get Started
Click the Link Below To Start
Thank you for shopping with us;
If you have any questions about Witchkrafted's Terms and Conditions Click Below.
Remember each vendor has their own terms and conditions for their products, click on their name or profile to see their Terms and Conditions individually.
Click to see our Terms and Conditions


